Finally trying studio shots - C&C please!
C&C absolutely welcomed - bring it on!
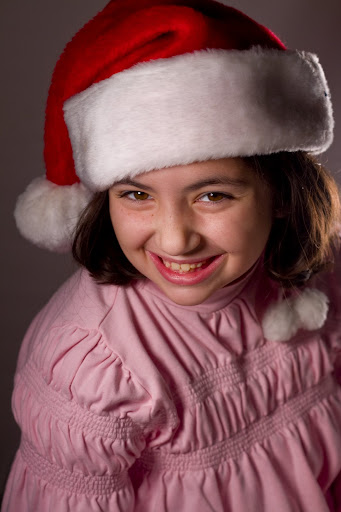
I finally decided to try my hand at "studio" (HA!) lighting. The setup translates into two workman's clip lights with 75w reveal lightbulbs and a bunch of pieces of foamboard reflectors (two of which were taped together as a background, the rest propped up and/or held in her lap to bounce some light from underneath).
I'm kind of making it up as I go along and don't feel like I know what I"m doing (and I didn't see the links for headshots in the technique thread until after I'd done this - I'll go and read them next) but just kind of moved the lights around until I liked what I saw in front of me and on the LCD.
For these, it was one lamp with no diffusion to camera left approx 45 degs, and the other opposite (behind her) but with a sheet of tracing paper stuck over it to act as a diffuser.
Btw, these are also some of my first efforts in raw, and I haven't got the WBs consistent yet. Bear with me.... Learning curve!
1
2
3
4
5 This was actually the first shot I took and was a different setup before she went to go get the Santa hat - we were just messing around ... and I don't really remember what I did! ALl I know is that the main light was off to camera right. I actually prefer the clarity of this - maybe one of you can figure out where the lights were and why it works?! Oy... there is SO MUCH TO LEARN...... :bow
facebook | photo site |
0
Comments
Anybody who can face commenting on yet another batch of "first attempts" I'm all ears - dying to learn. (And of course continue to point me to other sources of info to learn more - I'm googling, Strobist-ing, Sublime Light-ing and all the rest, but I'm definitely only at the very beginning of this particular journey so.... bring it on!)
Thanks!
I'm still getting frustrated because, even though the results aren't bad (although it takes a LOT of shots for me to get a few decent ones - my keeper rate is way too low at the moment), I'm still not quite understanding WHY some things work and some don't.
For instance:
- Why were the ones where she was in white (against a white background) so much easier to light and so much CRISPER? I can't figure out why those are so much better than the ones in the softer-coloured clothes.
- despite the same settings, some of them came out kinda "cloudy". Is it possible that in close quarters I'm getting lens flare?
- I'm generally happier with the ones where the lamp does NOT have tracing paper over it to diffuse it - it seems to work better if it's "naked" but closer (to soften it). Is this just because it's brighter that way or....?
- where does a fill light usually go relative to the key light, what direction is it usually pointed, is it above or below the face/key light and how do you prevent it causing more (rather than fewer) shadows? No matter how I position it, it seems to make it worse rather than better.
- Ghetto background: we had an old garment rack down in the basement that we weren't using any more . Threw a white sheet over it and SCORE! Was a lousy, rickety garment rail, but works just fine as a bg stand.
Anywhere, here we go - C&C would be great - I really want to try and figure out the why's and wherefore's here....!
PS These are, of course, the good ones. There are plenty of cloudy, harsh-shadow ones if those are any use as "teaching examples" to help me figure this out better by flogging my mistakes! (No problem - happy to have them flogged if it'll help the learning process both for me and any other hapless reader now or in the future!)
...and take the rest with a grain of salt....as I am no expert on studio lighting whatsoever...
Its funny you posted these...with the call for advice at the exact time that I am reading a decent book by Monte Zucker. Ill share a quote of what he has to say about lighting as I thought it was a superb explanation.
"Like good posing, lighting is almost invisible-it is a means to an end, making a statement about the subject in the portrait without calling attention to itself. Poor lighting, on the other hand, is conspicuous and distracts the viewer from the subject."-from Monte Zucker's Portrait Photography Handbook
I really liked reading that statement because it is very closely in line with my own view of what role light plays in a photograph.
Well, enough of that...on to your shots!!!
1-
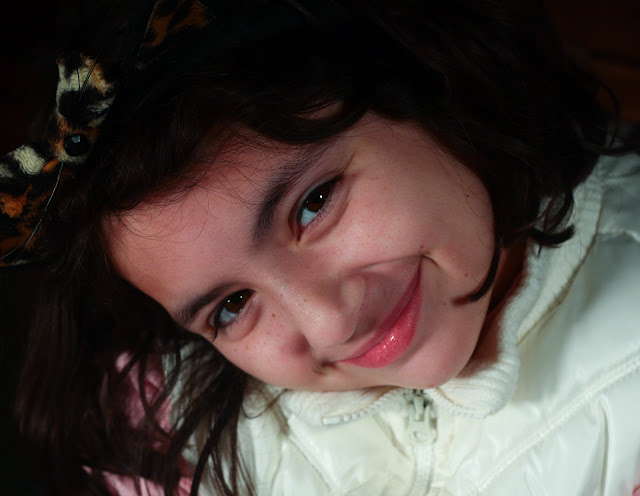
In this, the shadow on the white part of the hat looks out of place. I think if you could have reflected enough ligh righ there then any other minor imperfections would have been corrected. The location of the shadow under her nose is good. This is defined by those in the know(not me!) as "short loop " lighting.
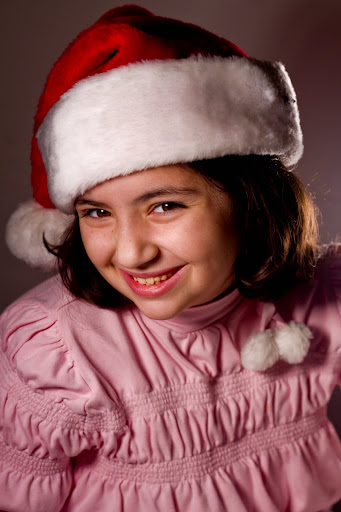
2- See comments above.....still a black shadow on the hat.
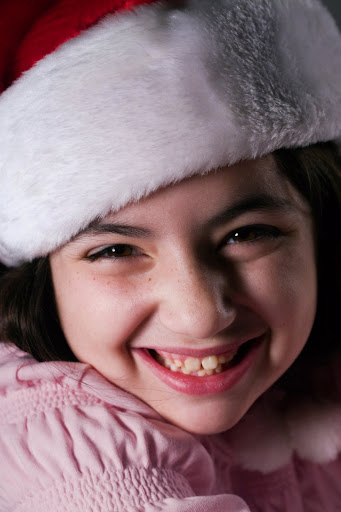
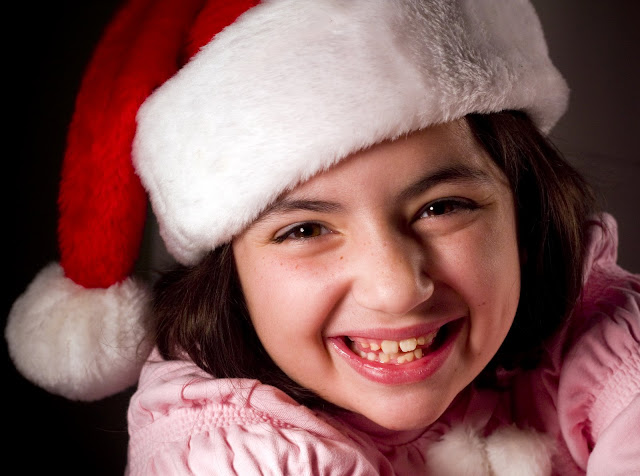
3 and 4- The shadow along side her nose is simply too dark. My guess for the set up you are using...would be to set up a fill light at camera right to fill that shadow, and then move it back...maybe double or triple the distance that the main light is to her face. You want to get some light in there, but not so much that it becomes flat.
Be carefull putting paper over those lights. They can get awfully hot! Also, now that you are shooting RAW....and truely handling every aspect of your processing, you probably want to start thinking about a device to calibrate your monitor. I see that the shadows I have mentioned appear much less an issue her on this uncalibrated laptop as on my calibrated desktop monitor. This leads me to believe that you may be using an uncalibrated monitor yourself. The device I use is realatively inexpensive. Processing, without one only guarantees that your images will look fabulous on YOUR monitor. Other viewers and prints may offer up surprises in that regard.
In all, I admire your thirst to learn and explore. These are really fantastic photos considering what you are using for light. I see enough here to realize that once your technical proficiency and gear set is on par with your vision you are REALLY going to enjoy photography.
Jeff
-Need help with Dgrin?; Wedding Photography Resources
-My Website - Blog - Tips for Senior Portraiture
Very helpful observations (and thanks for the kind words - y'all are so encouraging, and it keeps me going to keep trying and trying until I figure this stuff out)
About the paper - I'm a fire freak (ie terrified of it) and am constantly checking them to make sure there's no indication of any scorching. Plus, I actually HATE doing it that way for just that reason, so I'm trying to think of a way that I can make a frame for the sheets and use some kind of clips to attach to the lamp at a greater distance from the bulb!!
Or, of course, invest in proper flash lighting equipment
I like the lighting you've achieved. I think the composition is off in the first two, but then things improve considerably
The problem is it looks like you are standing up, shooting downward and cutting too close. If you open the view up some I think it would look nicer, you could then also take one of Strobist's techniques into play and cast some random shadows on background to break it up a bit.
I think we should too!
http://pyryekholm.kuvat.fi/
One help to your problem of heat and light temperature is to go to Home Depot or Ace and buy these:
True daylight balance and since they are CFL bulbs, no heat.
I used them to build a light tent for product photos:
And was pleased with the results.
I use them in my basement studio as well to have sufficient light in the room to keep pupils from dialating too much.
Good luck - I love the low budget approach - it can pay off in huge rewards.
Z
Thanks!
ETA: My "light tent" is on the same lines (although I did use the model on The Strobist and go with a cardboard box from the basement, but same idea!). I'm thrilled with my budget (free) bg "stand" however- that thing has been wasting space in the basement since it was too rickety to use as a coat rack and pretty much useless, but has now found new life (and it breaks down easily so I can stow it behind the door
I can speculate on the answer to this: the white background and clothing is kicking back more light than the darker background and clothing, acting like a big, soft lightsource. The darker background is greedily sucking up the few lumens your lamps are producing, leaving those images softer and shadowier.
I learned this outside the studio when I was shooting an egret in the early morning standing on a rock in dark water. While I was shooting, along came a boat behind the bird. I was bummed about the boat 'interfering' with the photo until I saw the results. The shot with the boat just out of the image behind the bird was by far the best of the bunch. The white boat had acted as a big, white reflector.
So how do you apply this in the studio? If you're shooting pictures with dark clothing and background, set some big pieces of white foamcore that you can stand up really close to your subject to counteract the light absorbing qualities of the clothing and background.
I wondered if that might be it, but I wasn't sure if the clothing itself would have enough of an impact to cause it.
Yeah, I'm well supplied with foamcore just now (gotta love Dollar Tree - $1 a sheet!) I was using reflectors, but possibly not enough, or they were too far away - I need to figure out a way of supporting them (the music stand was already in use as a light boom on which one of the lamps was clipped!)
We do have a HUGE mirror over the piano (camera right in those shots) - I need to figure out how to harness its reflective qualities as well...
Thanks for the comments (and keep 'em coming - this is GREAT!)
A good rule of thumb is for the lighting ratio to be between 1:2 and 1:4, meaning the fill light be between 1 and 2 stops less then the key light.
Position of the lighting is all driven by the effects you are trying to obtain. One "standard" setup is to have your key 45 degrees off the camera-subject line, about 45 degrees off the floor and the fill quite close to the camera-subject line. The key will throw your shadows for you and your fill will soften them. The shadows thrown by your fill (and there will be some) will, in large part, be over-powered by the key light.
May I suggest you google and research the following terms: "Loop Lighting", "Rembrandt Lighting", "Cross Lighting", "Short Lighting", and "Broad Lighting". In addition to learning about the "classic" light setups, you will see how others have positioned lights and the results obtained.
My Photos
Thoughts on photographing a wedding, How to post a picture, AF Microadjustments?, Light Scoop
Equipment List - Check my profile
This is GREAT info. Most of the articles and info I've come across assumes you understand this already, and I'd been trying to piece it together -your comments provided the "lightbulb moment" (you should pardon the pun), and I suddenly understand the ratio-ing AND realise how i can effect that simply by moving things closer or further away (d'ohhh! It's not exactly rocket science, but it has never been clear to me before - the penny just dropped!)
This is also hugely helpful - until you know the correct terminology, it's hard to google effectively (I'd stumbled on broad and short lighting, but the others are new terms to me so of course I'd never known to look them up)
This is GREAT - thank you!!