DIY small softbox
After I looked at this item online this morning I decided to try and make my own softbox. I found quite a few designs online that other people have done which gave me loads of ideas, but I didn't have any of the stuff to hand and no opportunity to get it today, so thought I'd try to make one with stuff I already had, if only to see if I could. It was one of those, "Hmm... what do I have in the house that I could try this with?". In case it's of use to anybody else, I took some snaps as I did it (posted below)
Of course, I've only tried a few test shots with it and so am not entirely sure how effective it will be (?!), but the few snaps I took definitely were more diffused and more attractive (although I may also add a second piece of tracing paper (or sheer fabric) when I get the chance to soften it even more. Given it's so small (approximately 8x10" front panel), I figure it needs all the help it can get...)
Even with the mistakes from trial and error total time to make it was about an hour, and total cost of "new" items required were 2 sheets of Walmart 33c foam, and I happened to have those lying around so net cost to me was zero.
The only cardboard we had was an empty carton which had housed a 12-pack carton of seltzer. I split it down thhe middle of one of the long sides (not at the fold) so that I could manipulate the card into the trapezoidal shape I associate with SB's and stapled it and the short sides into an approximate frame (you can see the edge of the box where I folded it round on the lh side, and I used that handhole as the starter for the hole on the bottom where the flash goes)
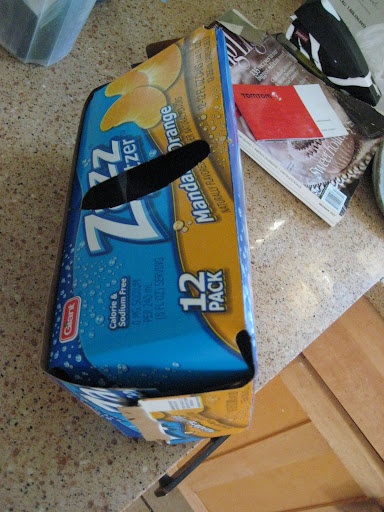
I then cut out a front
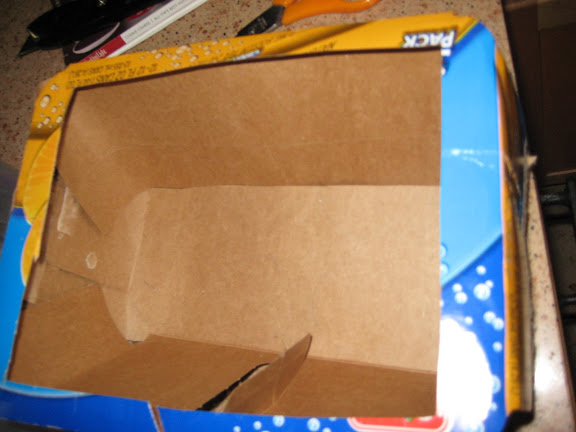
I then cut a hole in the bottom so the flash can be inserted that way
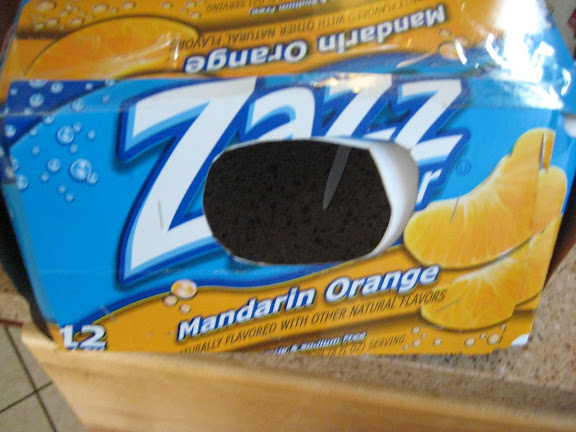
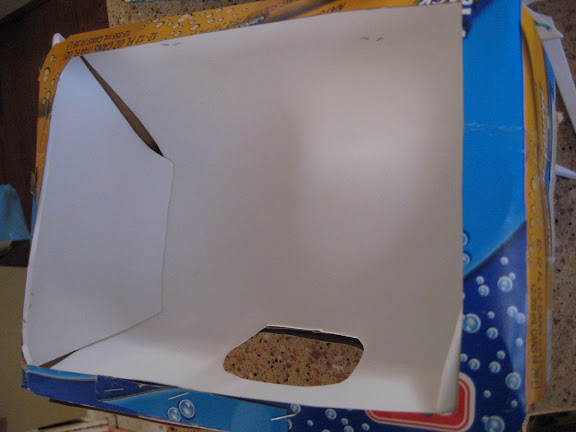
Looking at the ones I saw online, I guessed that the inside needed to be lined with white. I used some of the craft foam I had lying around because it gave the (thin) cardboard a bit more stiffness without weighing it down.
I then cut a strip of black foam approximately the same length as the perimeter of the opening
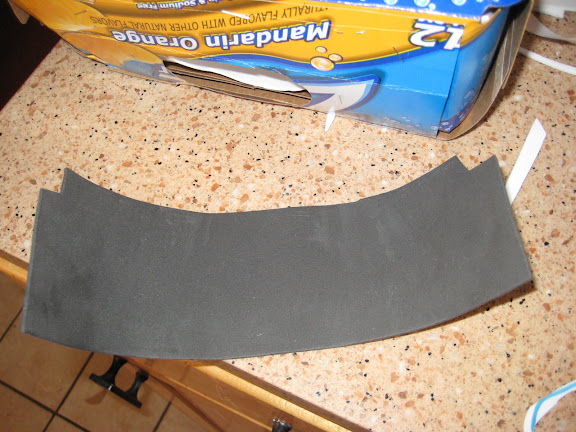
I snipped into the edge so that I could fold those up to attach it to the cardboard (and allow it go round curves - nice to know the knowledge gained in those years of sewing has more uses than just making garments!) and then I hotglued it into place (as well as hot glueing the seam where it joined itself)
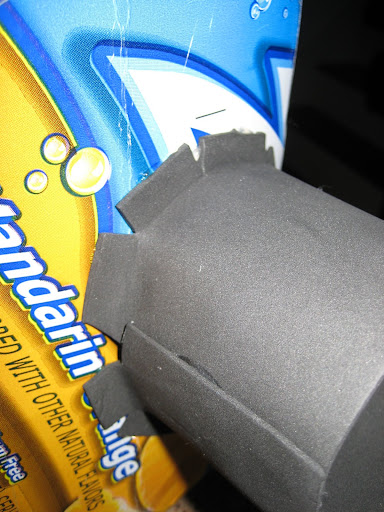
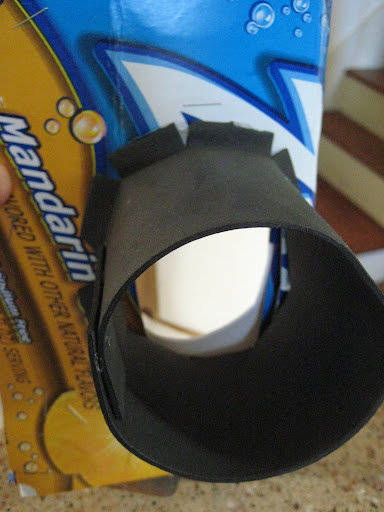
I also trimmed and shaped the front a bit so that there's a cutout and none of the sensors are blocked.
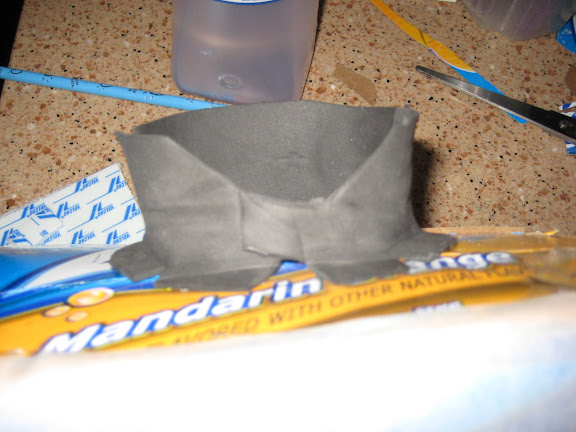
I originally thought I would add velcro tabs to the collar and flash, but that was cumbersom, so I'm currently just holding it in place with the infamous ball bungee, which works a treat.
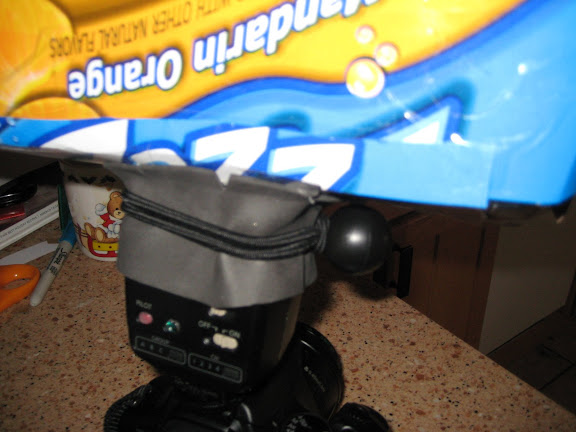
I will pretty it up with some black (or white) sticky-backed-plastic later, but for the time being here it is:
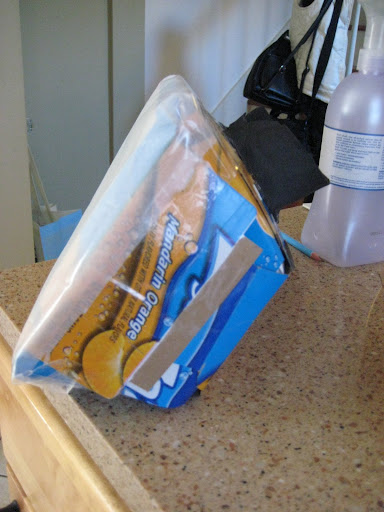
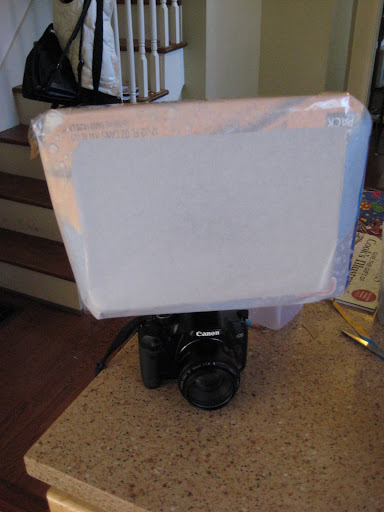
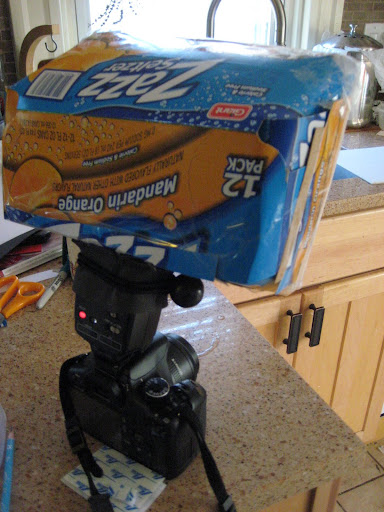
As I said, I've only tried a couple of test shots, but so far so good - I'll give it a real whirl some time over the next few days and see whether it achieves much more than "a bit better than bounced". But it didn't take very long and was kinda neat to make it for zero cost!!! ::feels very proud of self:ivar::
Of course, I've only tried a few test shots with it and so am not entirely sure how effective it will be (?!), but the few snaps I took definitely were more diffused and more attractive (although I may also add a second piece of tracing paper (or sheer fabric) when I get the chance to soften it even more. Given it's so small (approximately 8x10" front panel), I figure it needs all the help it can get...)
Even with the mistakes from trial and error total time to make it was about an hour, and total cost of "new" items required were 2 sheets of Walmart 33c foam, and I happened to have those lying around so net cost to me was zero.
The only cardboard we had was an empty carton which had housed a 12-pack carton of seltzer. I split it down thhe middle of one of the long sides (not at the fold) so that I could manipulate the card into the trapezoidal shape I associate with SB's and stapled it and the short sides into an approximate frame (you can see the edge of the box where I folded it round on the lh side, and I used that handhole as the starter for the hole on the bottom where the flash goes)

I then cut out a front

I then cut a hole in the bottom so the flash can be inserted that way

Looking at the ones I saw online, I guessed that the inside needed to be lined with white. I used some of the craft foam I had lying around because it gave the (thin) cardboard a bit more stiffness without weighing it down.

I then cut a strip of black foam approximately the same length as the perimeter of the opening

I snipped into the edge so that I could fold those up to attach it to the cardboard (and allow it go round curves - nice to know the knowledge gained in those years of sewing has more uses than just making garments!) and then I hotglued it into place (as well as hot glueing the seam where it joined itself)


I also trimmed and shaped the front a bit so that there's a cutout and none of the sensors are blocked.

I originally thought I would add velcro tabs to the collar and flash, but that was cumbersom, so I'm currently just holding it in place with the infamous ball bungee, which works a treat.

I will pretty it up with some black (or white) sticky-backed-plastic later, but for the time being here it is:


As I said, I've only tried a couple of test shots, but so far so good - I'll give it a real whirl some time over the next few days and see whether it achieves much more than "a bit better than bounced". But it didn't take very long and was kinda neat to make it for zero cost!!! ::feels very proud of self:ivar::
facebook | photo site |
0
Comments
*and it is cool that you can get it in any flavor?
Lets see the fruits of your labor?...as in photos taken with and not of the softdrinks?
Jeff
-Need help with Dgrin?; Wedding Photography Resources
-My Website - Blog - Tips for Senior Portraiture
The inside of my softboxes have silver reflector stuff inside of them. Maybe you should try some tin foil to line the inside with...
Flash Frozen Photography, Inc.
http://flashfrozenphotography.com
I'm still just trying to figure out how to get the blasted flash off the camera within my means right now so I can see if this thing really works or not! I guess I'm gonna have to use a cable, but because I'm all Canon and I'd like to retain ettl, that's still not exactly "cheap". (That said, I still haven't read through all the info on The Strobist on that subject yet so maybe there's a solution still. Here's hoping!)
I'll hopefully get to try it out on folks in the next few days - predictably, we're up to our eyes in holiday mayhem this week, but I suspect I'll either demand family pictures, or alternatively sneak off and work on some more SP's at some point...
Now my question is...do you have to custom white balance for the mandarin-orange or not?
My Images | My Lessons Learned and Other Adventures
Before I bought the STE2, I toyed with the idea of buying a Canon off camera shoe cord and an extention for a pc mouse...plus some fittings to cut the cord and extend it with the mouse cable. I am pretty sure I found the info on that at strobist. You can google...." diy extend canon off camera shoe cord"
Anyway, I never did it. They don't exactly give away the cords, and because of that I didnt see me snipping a new one in half. I figured I could tie a hundred bucks up in the project....or spend another hundred and have what I want.....STE2....off camera...multiuple flash control.
Jeff
-Need help with Dgrin?; Wedding Photography Resources
-My Website - Blog - Tips for Senior Portraiture
Yeah, I know - so far, I'm not thrilled by the idea of shelling out for cables that I'll ditch as soon as I can save up enough for the ste2. And if things start to look up for next year (or somebody buys the XT outfit I'm selling
IF the flash to subject distance is constant ( and for a studio work it usually is), the exposure parameters never change, so just set your camera to the correct exposure in manual and shoot away.
Either a PC cord, or an optical sensor trigger will both work just fine.
Moderator of the Technique Forum and Finishing School on Dgrin
Hey Jeff - what do you think? Use something like this instead of the GF LS for your senior shoots? You won't get comments about carrying around a tupperware bowl. Instead, it'll be questions about what other flavors you light comes in:D
My Photos
Thoughts on photographing a wedding, How to post a picture, AF Microadjustments?, Light Scoop
Equipment List - Check my profile
Shots to come; probably LOTS in a couple of weeks since ::drumroll:: the XT outfit sold last night which gives me the money to go shoppin' for an st-e2. Off camera flash, here I come!
Google catus trigger or ebay triggers, lots of links on Strobist. My favorite cheapy camera gear store is Deal Extreme.
http://www.dealextreme.com
(you just gotta get over ordering from Hong Kong!)
That would have been my choice hands down IF the 420ex had manual mode; unfortunately, it is an ettl only flash so I was sorta stuck.... It was either: get an ste2, get a cable, or invest in a new flash/flash setup, none of which were in the budget until I sold the old gear
Wel...l
I normally forego a diffuser outdoors but...
If I avoid the diet soft drinks and use a crate from "the real thing" would I have sweet light?
Seriously.....I REALLY don't need to be carrying anything else around on those shoots. I've come pretty close to buying a little red wagon already just to drag all the gear around.
Jeff
-Need help with Dgrin?; Wedding Photography Resources
-My Website - Blog - Tips for Senior Portraiture
Some not-terribly-scientific tests. I think, in fact, that one sheet of tracing paper isn't enough -two definitely improved the reflections in these items to my eye, and I suspect the ripstop nylon will be even better. I think there's also a case to be made for attaching it from the back instead of the bottom, and that way only the bounce head will need to be inserted - given we will have another empty carton soon, I may try to make a Mark II if I'm feeling ambitious
On the plus side, it's very light and barely alters the balance of the camera at all.
In the meantime (sooc jpgs all set at 1/200 @f8, thus no adjustment made for light loss with extra diffusion)
Unmodified flash
TWO sheets of tracing paper
ONE sheet of tracing paper
www.achambersphoto.com
"The point in life isn't to arrive at our final destination well preserved and in pristine condition, but rather to slide in sideways yelling.....Holy cow, what a ride."
Yup, I'll be heading out to the fabric store as soon as I get a chance - I was maxed out with my last day of private students today before the holiday, so no TIME yet! Just been using what I have lying around pro tem. I'll post more test shots as i experiment with this in case it's of any use to somebody else on a shoestring budget. It's a no-brainer, really - with the lightweight card of the box, it's actually pretty nifty as far as ergonomics (did I REALLY just use the word "ergonomics" in relation to a soda carton?!) and I am ALL about that price tag. So now I just have to get it to do the job better
Modifications:
- ripstop instead of tracing paper
- entry from the back - this puts the front of the flash head further back from the screen and thus seemingly better diffusion (in Version 1 it was practically touching the front when it was inserted, which seemed to me to be not quite right....)
- foam collar wrapped in tape for strength and stiffness (although this makes it harder to load since it doesn't stretch as the foam does, but it will prevent the foam tearing and feels more secure because it's very tightly fitted. If I did it again, I'd simply make the collar slightly bigger on the grounds of the space the tape would take up, but that was a last-minute addition so I'm a couple of mm smaller than would have been optium. That said, it is very VERY secure. Still using the bungee for security too - velcro would also work)
- flavour options less obvious when box coated with black tape (and it stops light leaks too
More as this project continues evolving!
-On your sample shots, the shadows are noticably softer on the "with" verses the "without". Not much difference in shadows on the one vs two layer, but the highlights were better controlled on the two layer shot.
-I think it is funny that in the same paragraph where you describe beefing stuff up with duct tape and bungee cords you are describing measurments in "mm".:D
-When you finally do build the MkII, I REALLY think you should put this up for offers in the used gear/for sale threads. Just for fun!
Jeff
-Need help with Dgrin?; Wedding Photography Resources
-My Website - Blog - Tips for Senior Portraiture
Oh, and it would be interesting to see a shot of the product as it stands right now. Your description is pretty good, but a picture is worth 1,000 words.
Looking forward to Mark II
My Photos
Thoughts on photographing a wedding, How to post a picture, AF Microadjustments?, Light Scoop
Equipment List - Check my profile
Jeff
-Need help with Dgrin?; Wedding Photography Resources
-My Website - Blog - Tips for Senior Portraiture
Yes, that's what I thought too. The ripstop is approximately the same light loss as the 2 sheets as far as I can tell, but with an even larger distrubution fo the light. Hoping to try it out on people at the family gathering this evening where I will have new unuspecting victims who don't run away the minute they see the camera in my hand!!
Guilty as charged. American who spent childhood and ~half adult life in the UK so I tend to think in both metric and imperial (fwiw, small increments I always imagine mm - anything larger than about 1/3" and my brain switches to feet and inches - there is ZERO logic to it, but it's consistent in my head!!
HA! We'll see... I think I'd feel guilty taking money for an old soda box and, while it's not exactly hard, I'm not sure I'm ready to go into mass production
A Happy Christmas to you and your beautiful family!
Here's where we're up to. The main thing (in case anybody else tries it) is to create the frame a little more accurately than I did and actually measure both sides as the box is wrapped around into the shape so that it's square and level, which this one isn't really (the tape measure may be in the kitchen, but I didn't actually, yanno, USE it except to photograph
(These were all taken with the pns in between holiday cooking so not exactly high art)
rip stop + taped frame
Foam collar at the back, but before I wrapped it in tape for strength:
Taped
On camera with wrapped collar
Samples with results when there are some to share!
Alas, most of our favorite beers come in bottles...without cartons!!
Nothing done to these except to run the same "auto contrast" function on both (to keep the comparison as controlled as possible). Would've been more obvious with a light background, but this just happened to be my mom's holiday dinner table
Without (check out that shadow under/left of the fruit stand)
With (no FEC to compensate for light loss w/box)
Works for me!