What would you do with this.....

I am just learning how to use photoshop CS2 to enhance my shots. I would love to get some help from you photoshop geniuses....Out of curiosity, what would you do with this image if it was yours or if you were an editor.....I personally dont think it needs anything, maybe a little "pop"? Your opinion would be appreciated too.
If you think it could benefit from "enhancement" I would love to see it and if you could include instructions along with the finished product would be appreciated so that I can practice with similar situations. Thanks in advance for your help!
If you think it could benefit from "enhancement" I would love to see it and if you could include instructions along with the finished product would be appreciated so that I can practice with similar situations. Thanks in advance for your help!
0
Comments
I was wondering though-can you guys not do anything with it if I have left my watermark on it?
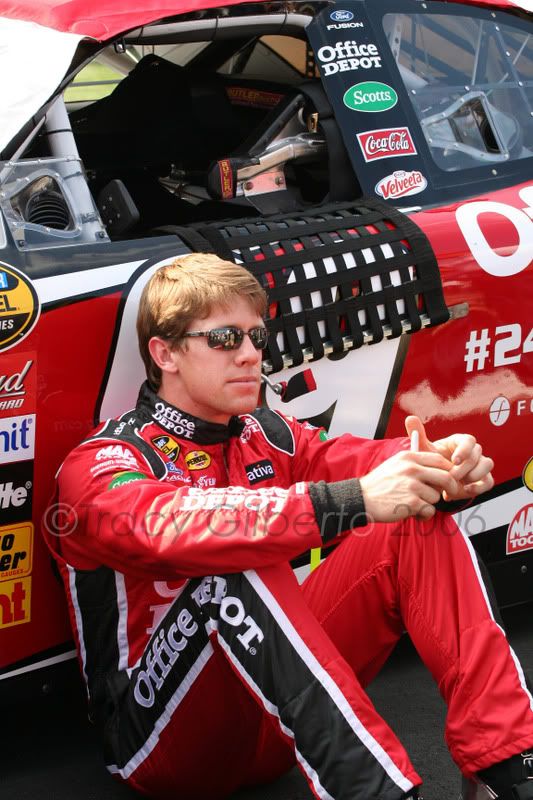
Here is one that I do think really needs help...I have tried the smart shapener, but I cant figure out how to get it to just sharpen the eyes. I have used curves to lighten it up a little but it seems so flat. I am just now reading about layers and how using them is supposed to be better. I tried the tutorial for "Pop" but I think I'm missing something in the instructions.
I am currently practicing some of the tutorials, Thank goodness for them! I am not having a whole lot of luck as of yet but I will keep plugging away till I get it!
Canon Stuff
www.craftgirlcreations.smugmug.com
are.
BEFORE:
AFTER:
If you like the edit I'll give you a step-by-step.
http://bertold.zenfolio.com
As to the next image - sharpening here probably won't help. It would appear that the driver's face is not in focus, so sharpening tools will not be much help.
GreyLeaf PhotoGraphy
Duplicate the background, sharpen the entire duplicate layer and use a mask
to apply it only to the eyes.
http://bertold.zenfolio.com
I just noticed that, thanks for pointing it out....i will see what i can do. I have gotten pretty handy with the cloning tool. This will definately be a test of my skills...lol
I was thinking the same thing and I could just kick myself for not focusing correctly. He was in a big hurry at the time so I had to be quick. This is exactly why I go to so many races....you cant get practice for these kind of situations any other way. Its impossible to duplicate the situation at home.
Canon Stuff
www.craftgirlcreations.smugmug.com
I would like to see the steps you followed. I could definately try it on a less oof shot. I like the drama, drama is good! lol
Canon Stuff
www.craftgirlcreations.smugmug.com
Canon Stuff
www.craftgirlcreations.smugmug.com
I want the green flag to be more noticable, the sky to be bluer and the cars to be brighter to draw focus...Does anyone know of a book that has step by step instructions for these kind of things? The one i have is broad and vague and has a lot of fluff in between steps. edit adding comment.....now the more time i spend on this one, the more i realize that this one is rather hopeless too as far as sharpening goes. but I figure maybe with someone elses better knowledge of options there might be a way to save it.....Help...lol
Canon Stuff
www.craftgirlcreations.smugmug.com
"use a mask to apply it only to the eyes."
Thanks so much!
Canon Stuff
www.craftgirlcreations.smugmug.com
1) Boosted the contrast with an S-curve in luminosity mode (in other words,
I created an curves adjustment layer, set its blending mode to luminosity and
changed the shape of the curve to an S),
2) Created an empty layer and filled it with black. I set its opacity to 50%.
I then added a mask to it and white a large soft brush painted with white
around the man's face to bring it out. This technique is what brought focus
to the eyes and face.
3) Next I created an empty layer in Overlay blending mode and painted over his
eyes with a 10% white brush to make them brighter.
4) Finally, I merged all the layers, set the blending mode of the merged layer
to Overlay and ran a High Pass filter with a 1.2 radius to sharpen the image.
Yes, it looks a bit oversharpened, but a file that small isn't really much to work with.
Here's your other image:
BEFORE:
AFTER:
On this one I did the following:
1) A curves adjustment layer to brighten the cars up. The initial adjustment
affects the entire image, but I then filled the layer's mask with black and used
a white brush to paint in the effect on just the cars.
2) A curves layer in which I boosted just the green channel. This also affected
the entire image, but again, I filled its mask with black and painted with
white over the flag to make it really stand out.
3) I used the quick wand tool to select the sky, then added a Hue/Sat
adjustment layer with the selection active. This makes the H/S layer affect
only the sky. In the layer dialog I played around with the hue slider till I got
a reasonably blue color. Then I pushed the ligthness slider slightly. The sky
still doesn't look too good, but there is no detail in it to work with, so you
either leave it as is, or add a sky from a different image.
4) I copied part of the good track onto a separate layer and stretched it out
over the lower part of the image to get rid of the distracting barrier. The
transition between this transformed layer and the original layer was rough,
so I added a mask and painted along the transition line with black to make
it disappear.
5) High pass sharpening as before.
Let me know if anything still needs clarification.
http://bertold.zenfolio.com
If you sharpen an entire layer, yet want to only affect the eyes, you have to
add a layer mask to the sharpened layer, fill it with black and paint on it with
white over parts you want to be affected by the sharpening. This is really
basic stuff that you'll need a good grasp of before venturing further into PS.
http://bertold.zenfolio.com
What you did with the "last start" shot is exactly what I was looking for. I will practice till im blue in the face and post my results...hopefully I will do your tutoring justice...lol
Canon Stuff
www.craftgirlcreations.smugmug.com