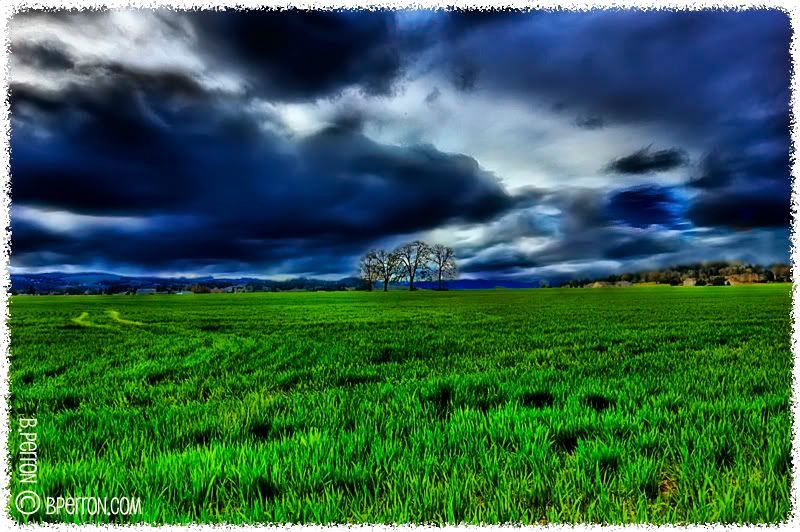
1st serious attempt at HDR
So this is my first time I have sat down and spent some time with HDR...Alot of people hate HDR..I love it, I do think some people take it a tad far in their tone mapping of it...I did my best to not go to over board....
(one thing to note, I am not happy with the amount of movement in the clouds, they were moving super, super fast today so they are more blurry then I would have liked, but oh well)
Would love to read what people think...
(if you do not like HDR, please do not comment as it is just pointless and you would not be happy with the photo, unless it was non-hdr)

Brandon Perron Photography
www.brandonperron.com
www.brandonperron.com
0
Comments
i had the same problems you are having here...(mine was redrock problems)
this doesnt mean its bad, it just means it kinda looks like the artsy software that paints photos...not hdr ive seen done very well...i know you worked hard on it...you may think it not over the top...but.......try and try again they say.....
www.brandonperron.com
I was kind of going for more of an art look not a real photograph...I have seen way more over the top examples before, most of the ones I have seen are super over the top...I do agree that mine does depict a real scene, but that was not my intention.
www.brandonperron.com
(I just did this real quick, just a touch of sharpening is all)
www.brandonperron.com
HDR is the process of blending multiple exposures into a single image with wider dynamic range than the camera can capture. Automated HDR algorithms do this essentially by building masks which choose the best source exposure for each pixel (give or take...). However, when there is motion between the frames, the automatic algorithm gets confused. Some HDR implementations have ways you can give the algorithm hints so it does a better job, but that only works if the area of movement is small in the frame.
When there are large areas of movement, you can build better masks by hand in Photoshop. If the masking job is easy, I'll just layer up the exposures and build the masks with a paint brush. If the masking job is going to be more difficult, then I'll use the Photoshop "Merge to HDR action" and then blend in bits from the original exposures over the problematic areas. The key thing to realize is that, while Photoshop uses 32 bits for an HDR file, as long as you aren't trying to capture more than about 12 stops of dynamic range 32 bits is overkill and 16 bits is sufficient meaning you can do a simple 32->16 conversion and work from there. If you really need all 32 bits life gets more difficult, but truthfully when the dynamic range gets that large, lens flare tends to be a major issue anyhow.
One way or the other, your end result of the merge is a 16 bit HDR file which you can tone map to your hearts content.
All this I understand...as well as I understand how masks, channels and all that other fun stuff work...I just am not sure on the process you are talking about is all...
I am still also unclear what motion issues you feel I have? other then that I think that you and I are looking for different results, correct me if I am wrong on that.
www.brandonperron.com
Was this second version just one of the exposures or a blend?
As for the hypersharpend, supersaturated look of the prior shot; its not my style but if that's what you want, go for it. However, there are some more technical (rather than style) things that don't look right to me in that first version. Take a look at the horizon on the right. In your first version it is all muddled and looks like a bad Photoshop mask. By comaprison, the second version is crisp with detail in all the trees. Also, there appear to be double images in the clouds; I think the double images are there in both versions, but the sharpening of the first one has made the double image much more apparent.
I wish they could have been off center more as well...but I was limited by a 2 foot patch of area where I could walk, other wise I would be all over someone else's crop.
www.brandonperron.com
You are correct, the horizon at the right looks bad, the HDR came up with some crazy colors on that side, I just did a real quick color matching and blurring...so it does not look so good.
Lets try this one...again I used a masked and did not really spend a ton of time around the horizon, but let me know if this is more what you were thinking?
www.brandonperron.com
I say, if you're going to HDR something, go nuts. Make it art. I can see HDR for proper exposure and HDR for art. Do what you see fit.
Nice work though.
Moving away from photography and into cinema. PM me if you have questions about DSLR workflow or production questions.
Film Reel: http://vimeo.com/19955876
Something a little funny happened to the color on one patch of sky but otherwise yes. Now load that into your tone mapping software and go to town with it.
Thank you very much!!!! I love your HDR's!!!!!!!!!!!!!!!!!!!!!!!!!
www.brandonperron.com
The blue is just the blue sky peaking through the clouds on that day...
That is HDR conversion with light tone mapping done...kept it more realistic, then the arty one I posted with the first one.
www.brandonperron.com